

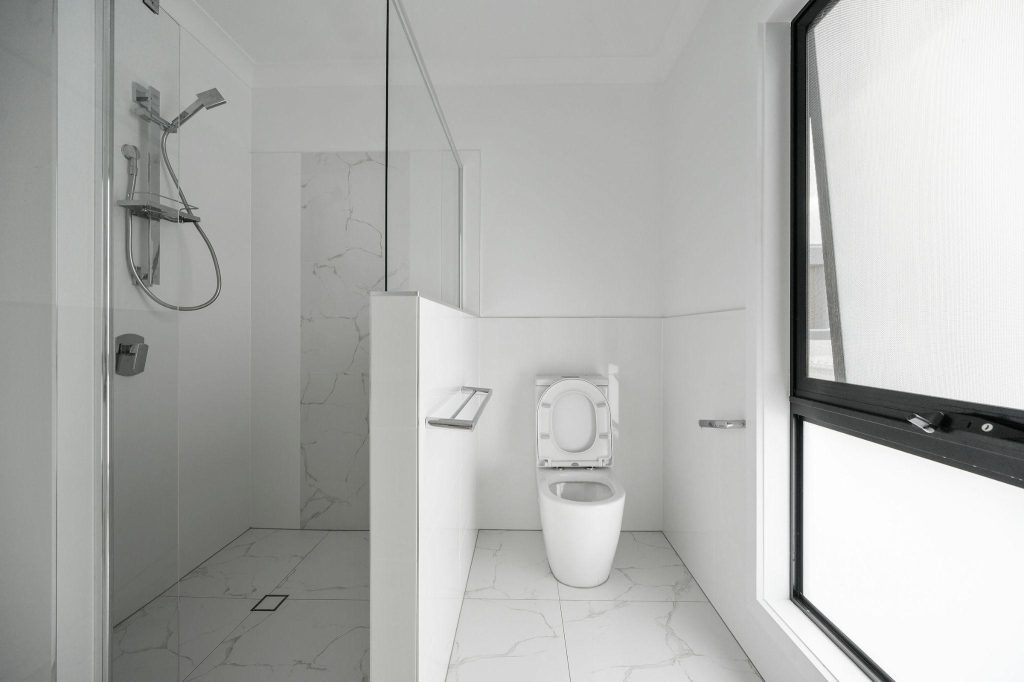
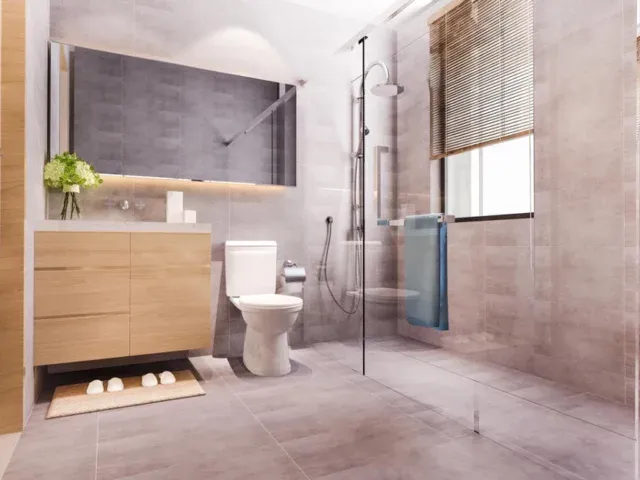
A walk-in shower adds a sleek, modern touch to any bathroom while providing a secure, accessible environment, especially for those with mobility issues or impairments.
However, to maintain its pristine condition, regular cleaning is essential. Over time, soap scum, hard water stains, mould, and mildew can accumulate, dulling its appearance and potentially causing damage.
In this guide, we’ll explore the benefits of having a walk-in shower for all members of the family and effective cleaning strategies with practical tips to keep your walk-in shower sparkling clean, ensuring both safety and comfort while preserving its sleek design.
Benefits of a Functional and Relaxing Walk-In Shower
Increase your safety
Bathrooms are common areas for slips, trips, and falls, but a walk-in shower can bring peace of mind by lowering these hazards.
With no steps or lip to navigate, accessing and exiting the shower is safer, especially for individuals who have mobility challenges or use a wheelchair. Walk-in showers also feature slip-resistant flooring, which reduces the likelihood of accidents.
Make Using Your Shower Easy
A walk-in shower eliminates the need to step over a high step or barrier, making showering more convenient for everyone. This design makes it more accessible to persons with mobility issues and eliminates the effort of climbing into a typical bathtub or shower tray. Walk-in showers allow for easy entry and departure, making the experience more comfortable for those in wheelchairs or using mobility assistance.
Independence and More Space for Assistance
Walk-in showers let you preserve your freedom at home by providing easy access and space to take the shower without assistance. These showers are meant to be spacious enough for caretakers or family members to assist comfortably, allowing for both autonomy and flexibility as necessary.
How to clean a walk-in shower?

Now that we know about the benefits of a walk-in shower, let us also learn about keeping them clean, user-friendly and space for any time use.
1. Understanding the components of a walk-in shower
Before you begin cleaning your walk-in shower, you must first identify the materials used. Most walk-in showers include the following:
- Glass panels and doors are prone to hard water stains and soap scum.
- Tiles and grout are susceptible to mould, mildew, and discolouration.
- Shower fixtures require regular descaling to eliminate mineral buildup.
- Shower tray or floor: Frequently collects filth and soap residue.
Understanding the components allows you to select cleaning procedures appropriate for each material. For example, glass requires streak-free solutions, whilst grout may require targeted mould treatments. Recognising these distinctions ensures the best cleaning results.
2. Gather your cleaning supplies
For the best results, gather the following supplies:
- A moderate, non-abrasive cleanser
- White Vinegar
- Baking soda
- Dish soap
- Microfiber cloths
- Squeegee
- Soft-bristled brush or an old toothbrush
- Spray bottle
- Rubber gloves
- Bucket
- Non-scratch scrub pad
- Commercial mould and mildew remover (optional)
3. Clean the glass panels or doors
Glass panels are the most apparent component of a walk-in shower and require specific care to retain their clarity.
Step 1:
Create a DIY cleaning solution by combining equal amounts of white vinegar and water in a spray bottle. Add a few drops of dish soap to boost cleaning power.
Step 2:
Spray the solution generously on the glass. Allow it to sit for 5-10 minutes to help remove soap scum and hard water stains.
Step 3:
Use a non-scratch scrub pad or a microfiber cloth to gently scrape the glass. Rinse well with warm water.
Step 4:
After rinsing, use a squeegee to remove the excess water. This prevents water stains and streaks.Pro Tip: For stubborn stains, make a paste using baking soda and water. Apply it to the stained areas, scrub gently, then rinse. Consider utilising commercial glass cleaners to achieve a speedier, streak-free polish.
4. Clean Tiles and Grout

Grout lines are magnets for mould and mildew, therefore regular cleaning is required.
Step 1:
Spray the vinegar solution on the grout lines and let it settle for 10 minutes. This helps to loosen dirt and grime.
Step 2:
Use an old toothbrush or a soft-bristled brush to clean the grout lines in circular motions. To remove difficult stains, make a paste of baking soda and water.
Step 3:
Rinse the tiles and grout with warm water, then dry with a microfiber cloth.
Pro Tip: To avoid mould formation, use a grout sealer every few months. This keeps the grout watertight and minimises discolouration.
5. Descale Shower Fixtures
Shower fixtures, such as the showerhead and taps, frequently accumulate mineral deposits from hard water.
Step 1:
Fill a plastic bag with white vinegar and wrap it around the showerhead using a rubber band. Allow it to soak for at least 30 minutes, or overnight if the accumulation is significant.
Step 2:
Remove the bag and clean the showerhead with a gentle brush. Rinse well with warm water.
Step 3:
To get a shining finish, use a microfiber towel to dry and polish the fixtures.
Pro Tip: After each shower, wipe down fixtures to reduce wet stains and buildup.
6. Clean the shower tray or floor

The shower tray can accumulate filth, soap scum, and slippery residue, thus it should be cleaned on a regular basis.
Step 1:
Sprinkle baking soda on the surface and then spritz with vinegar solution. Allow it to bubble and settle for 10-15 minutes.
Step 2:
Scrub the tray well with a soft-bristled brush or non-scratch scrub pad, paying particular attention to the corners and edges.
Step 3:
Rinse the tray with warm water, then dry it with a cloth.
Pro Tip: For textured surfaces, use a steam cleaner to remove stubborn dirt. Regularly wiping the tray after usage helps to prevent accumulation.
7. Dealing with mould and mildew

Mould and mildew thrive in wet conditions. Here’s how to address them:
Step 1:
Apply a commercial mould and mildew remover or a vinegar and baking soda solution to the affected areas.
Step 2:
Allow the solution to settle for 15-20 minutes to kill the mould spores.
Step 3:
Scrub the area with a brush, then rinse with warm water and dry well.
Pro Tip: Proper ventilation in your bathroom will reduce humidity and prevent mould formation. To enhance air movement, use a dehumidifier or leave the door open after showering.
8. Preventative Maintenance Tips
Regular maintenance can help to keep your walk-in shower clean while reducing the need for deep cleaning. Here are some prevention tips:
Squeegee Daily: After each shower, use a squeegee to remove water from glass panels and tiles.
Ventilate: Use an exhaust fan or open a window to provide adequate ventilation in the bathroom.
Daily task: Apply a daily shower spray to reduce soap scum and hard water stains.
Weekly routine: Set a weekly cleaning routine for the shower, focusing on high-use areas.
Seal Grout: Every few months, use a grout sealer to prevent moisture absorption and stains.
Adding ventilation measures, such as installing a high-quality exhaust fan or opening a window, can drastically lower humidity levels, preventing mould and mildew over time.
9. Natural Cleaning Alternatives
If you prefer eco-friendly cleaning solutions, explore the following natural alternatives:
- Lemon Juice: Use lemon juice to erase water stains and give a refreshing aroma.
- Hydrogen Peroxide Solution: Mix hydrogen peroxide with water to combat mould and mildew.
- Essential Oils: Add a few drops of tea tree or eucalyptus oil to your cleaning solution to provide antibacterial characteristics.
These natural alternatives are both effective and environmentally beneficial, avoiding the need for harsh chemicals in your house.
10. When to Deep Clean Your Walk-In Shower?
Deep cleaning is recommended every 1-2 months, depending on usage and water quality. Look for indicators such as discolouration, persistent stains, or low water pressure from the showerhead. Regular deep cleaning keeps your walk-in shower hygienic and visually pleasing.
11. Addressing Common Cleaning Issues
Problem: Streaky Glass Panels.
Solution: To avoid mineral stains, use distilled water in your cleaning solution.
Problem: Mould in grout.
Solution: Use a steam cleaner to penetrate and eliminate mould spores.
Problem: Hard water stains.Solution: Use a commercial hard water remover or make a mixture of baking soda and vinegar.
Cleaning various shapes of shower enclosures

Diamond Shower Boxes are unusually tilted shower enclosures that necessitate careful attention to their corners. To clean, use a soft-bristled brush to get into tight spots and remove soap scum or grime. Apply your cleaning solution equally to all glass panels and seams and let it settle before scrubbing. Rinse thoroughly and dry with a squeegee to avoid streaks.
Rectangular shower boxes are easy to clean because of their simple design. Spray your choice cleaning solution over the entire surface, paying special attention to the edges where water likes to accumulate. Wipe off large glass panels with a microfiber cloth or non-scratch pad, then use a brush to clean grout or tile. Dry with a clean towel for a streak-free finish.
Alcove shower enclosures, which are frequently installed between three walls, can collect dirt in the edges and corners where the glass meets the walls. Begin by applying a mold-preventing cleanser to the entire enclosure. Concentrate on the door tracks, since these can accumulate filth and mildew. To access small crevices, use a toothbrush, and then wipe clean the glass and walls with a squeegee.
To summarise, keeping a clean walk-in shower is important for both hygiene and aesthetic reasons. Regular cleaning not only maintains a bright, fresh environment but also extends the life of your shower fixtures and tiles. You may avoid the buildup of filth, mould, and mildew by using the correct cleaning products and techniques and sticking to a maintenance schedule. Remember, a clean walk-in shower improves your whole bathroom experience by creating a friendly and soothing environment each time you enter. Maintain easy cleaning routines, and your walk-in shower will look great for years.
RELATED POSTS
How To Clean Your Shower Head: Simple Descaling Tricks For A Spotless Bathroom
We all know, with time and regular use, your shower head can get clogged with... read more
30 Walk-In Shower Ideas for Any Size Bathroom
Transforming your bathroom into a stylish, functional sanctuary is a goal for many New Zealand... read more
Designing a Timeless Space: Your Guide to Classic Bathroom Design
A timeless bathroom blends elegance, function, and durability, creating a space that feels fresh for... read more

Stunning Bathroom Trends for 2025
Bathrooms in New Zealand are evolving into stylish, functional, hi-tech havens, and 2025 brings trends... read more
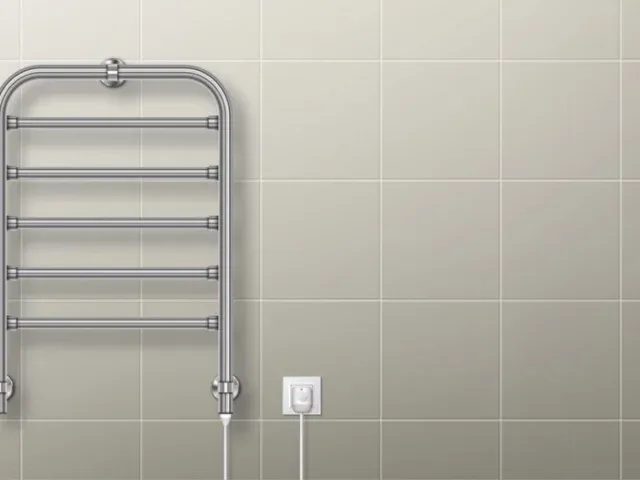
Do Heated Towel Rails Use a Lot of Electricity?
In New Zealand, where damp towels can feel like a fact of life, heated towel... read more
Modern Bathroom Ideas to Inspire You
Bathrooms in New Zealand homes have evolved from purely practical spaces into personal retreats where... read more

Walk-In Shower Trends & Ideas That Inspire
In today’s fast-paced world, people are increasingly looking for bathroom designs that offer both functionality... read more
The Future of Bathing: A Technological Revolution
The bathroom, once considered a purely functional space, is undergoing a technological transformation. What was... read more